Although I have completed the animation, I feel as if the whole animation is more in line with being a motion design one rather being traditionally animated. Although, I have tried to squeeze in as much traditional animation as I could , but the whole story and concept required more establishing shots and less character driven ones. Another issue I faced was the overall duration of the film. It exceeds the 30s mark and have tried to complete within the 1 minute mark and for every second exceed from the requirement, I have to justify it. It is much easier in this case as it can been seen that scenes required proper time to establish the tone and scenario and rushing anything would take just off put the pacing and go over your head. If given the oppotunity I would definately develop this as my final project.
Category: Chosen Idea 1 | Lights and Shadow
Last frame and final touches | Update #9
In this blog I will just put an update regarding the progress so far. I have been working on this project non-stop for about 2 weeks and I am satisfied with the way the video has turned out.
Some of the scenes felt as if they needed a proper transition in between so, I used envirionments, smoke and fire expolsions as an invisible cut and this transition has paid of quite nicely. You can check it out below.
The scenes are still lacking in terms of finishing and things like environmental smoke might do the trick.
Flashback scene Development | Update #8
The Flashback sequence was a less hassle than I hoped for. I already had a custom pack full of effects. But this time around, I cranked up the white glow, desaturated the entire pallet and voila a poor man’s version of a anime style flashback sequence was born. An inspiration for this scene was the opening sequence of the anime Nooragami
For the face being slashed I had to animate it frame-by-frame in 2s and went very abstract with the cutting of limbs/tissues.
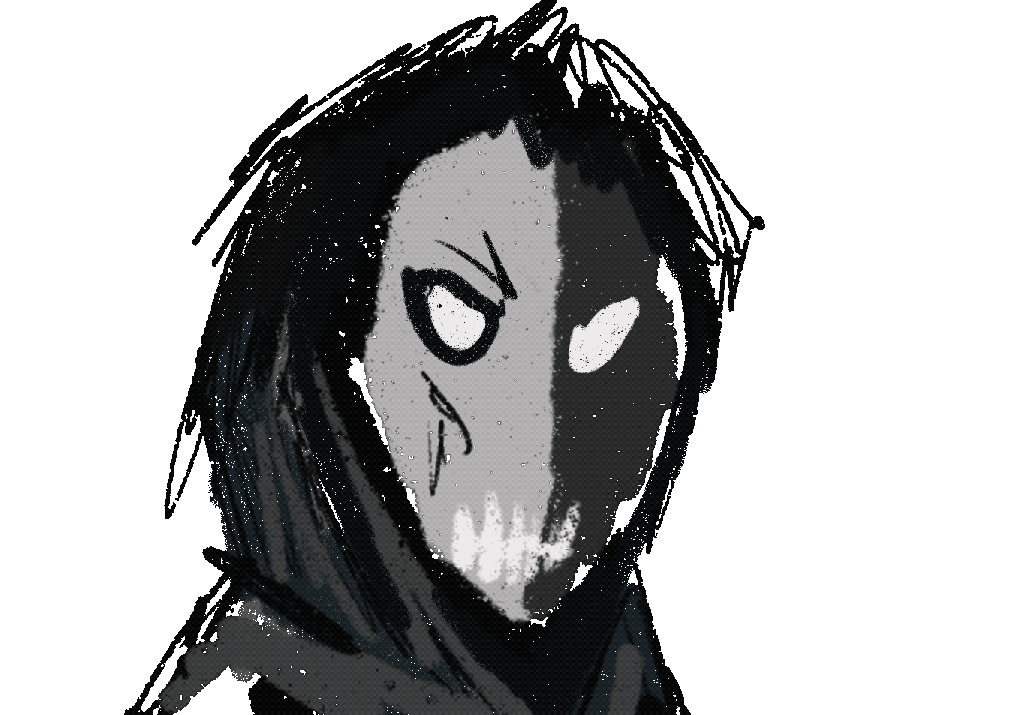
After applying glow and a blood splatter the effect was achieved quite easily. As for the second part of the flashback, I had to create a foreground, riddled with skeletons, while the city in the back had a to be distorted and a heat wave loo was created in after effects to give a burning effect. I added a bit of fire flames as well, but kept them in colour as red,blue, grey, orange and yellow are the repeating colours.

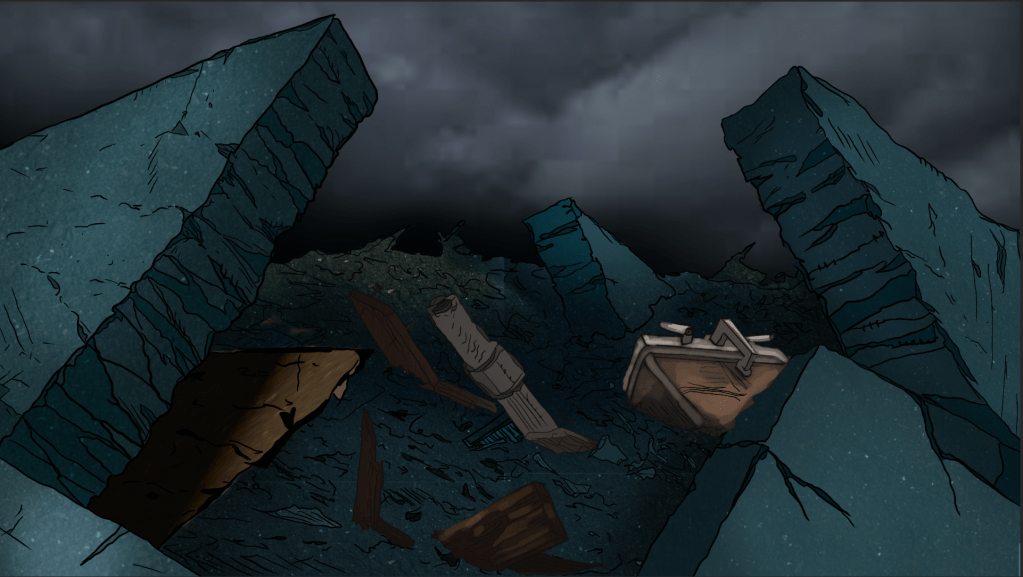
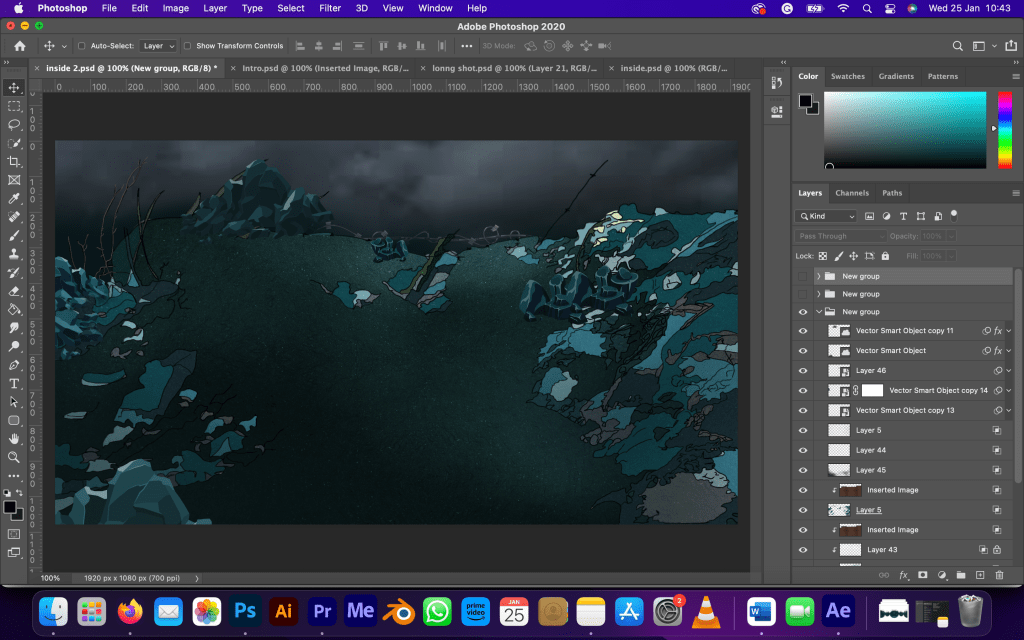
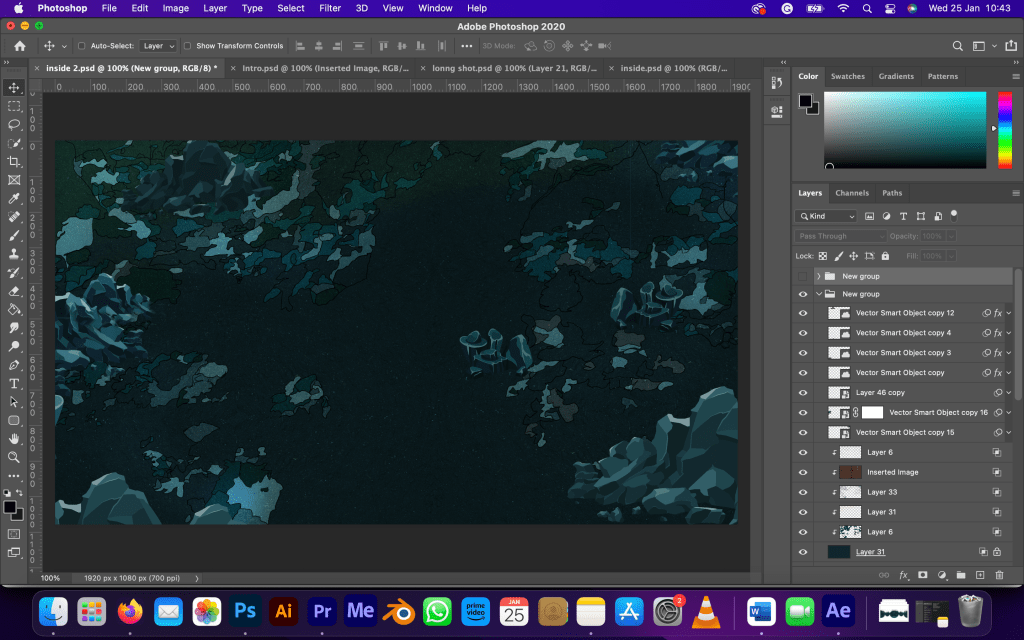
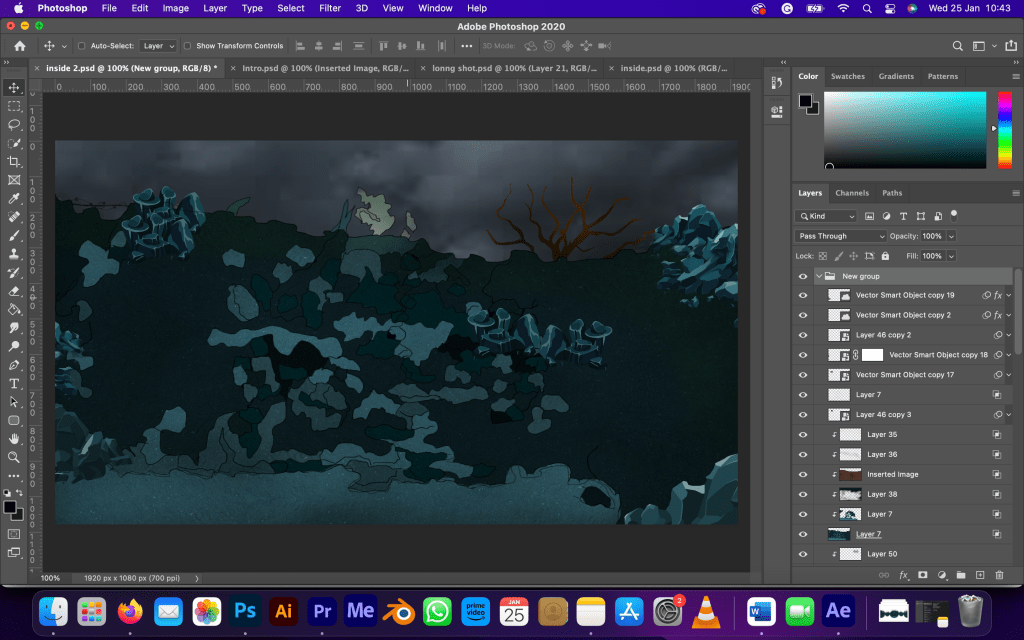
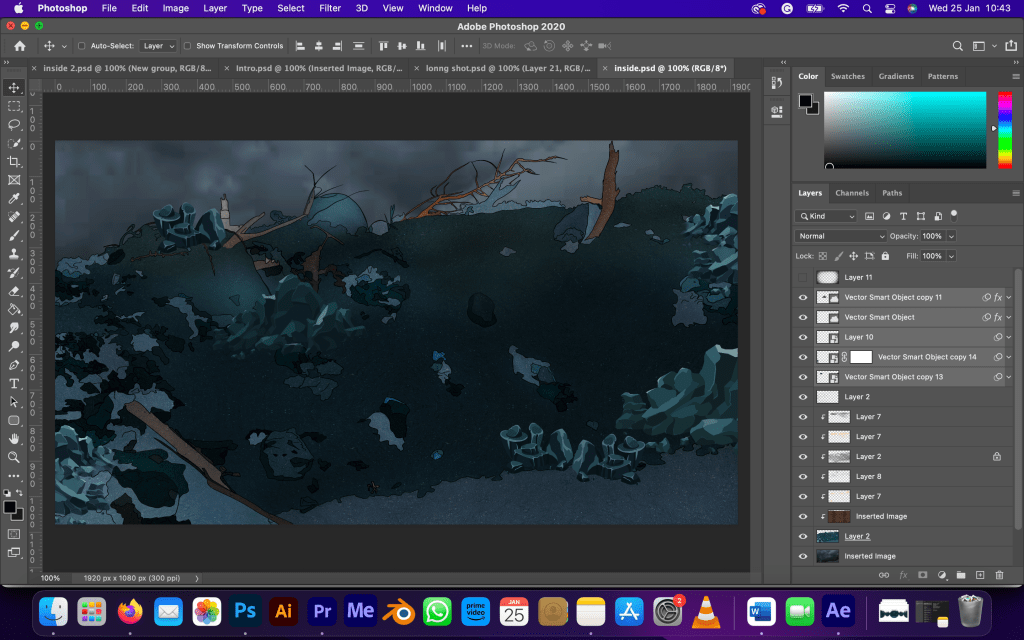
Environment Development | Update #7
I have spend the last 3 days in creating the inside of th trench environment from every angle. I did the same created a pack of smoke, environmental smoke, glow and fire explosion and applied to all of these frames. All of the frames are turning out beautifully and am proud of how the project is shaping up.
Experimentation and Development | Update #6
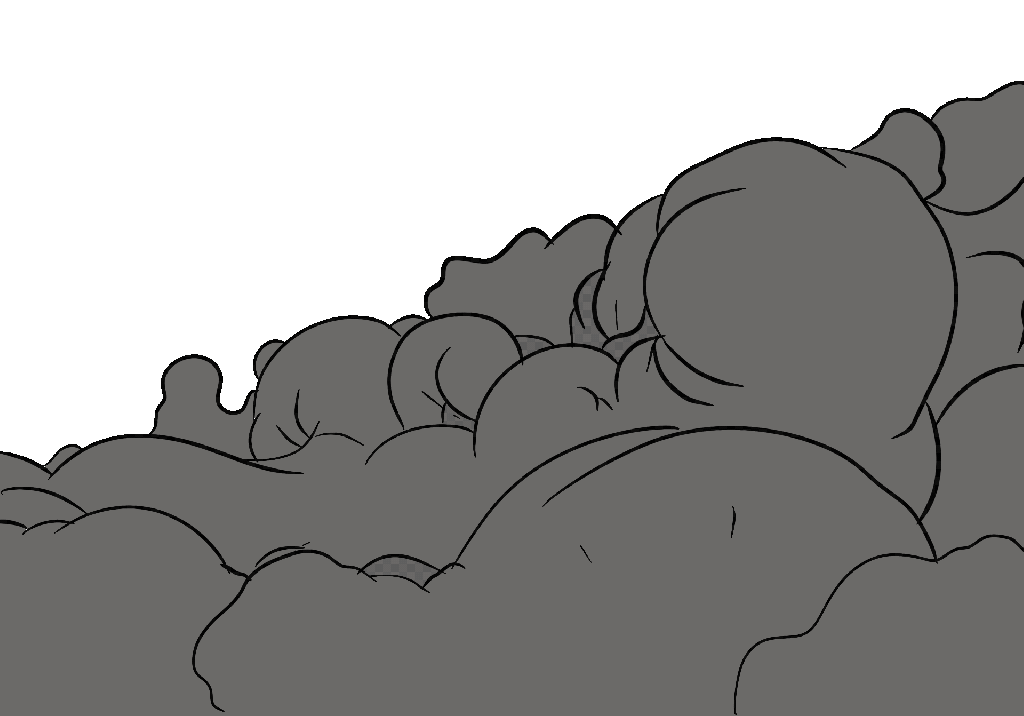
The scenes required for smoke and fire blasts as well as environmental smoke to set the tone of the film. I found good tutorials that taught how to create all of these animations in after effects.
After followinf the tutorials, I applied them into the final fisheye lens drawing. Added some lighting, a dark cloudy sky in the backgorund as well as a glow and environmental smoke was like the cherry on top to sell the effect.

Just in case I also animted a smoke cloud at 2s frame-by-frame.
I also created reactive shadows in after effects as well, where I turned to layer into 3d, rotated it and added key frames.
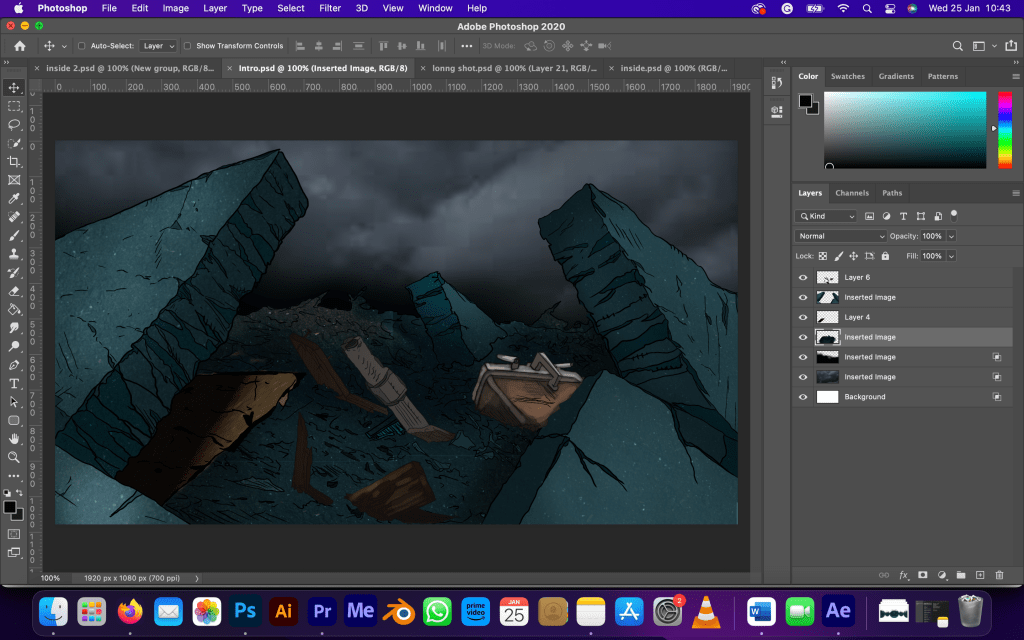
All of the elements came together quite nicely and below is first render

References
http://www.youtube.com. (n.d.). How to make 2D Explosions – After Effects Tutorial (No Plugins!). [online] Available at: https://www.youtube.com/watch?v=oI3HwfGClL0 [Accessed 25 Jan. 2023].
Marriott, B. (2020). The Best 2D Smoke in After Effects – Animation Tutorial. YouTube. Available at: https://www.youtube.com/watch?v=_A1v2Vw4mNE [Accessed 23 Dec. 2022].
http://www.youtube.com. (n.d.). Create an Atmospheric Smoke Effect in Adobe After Effects. [online] Available at: https://www.youtube.com/watch?v=ptQ6Re6JvWM.
Experimentation | Update #5
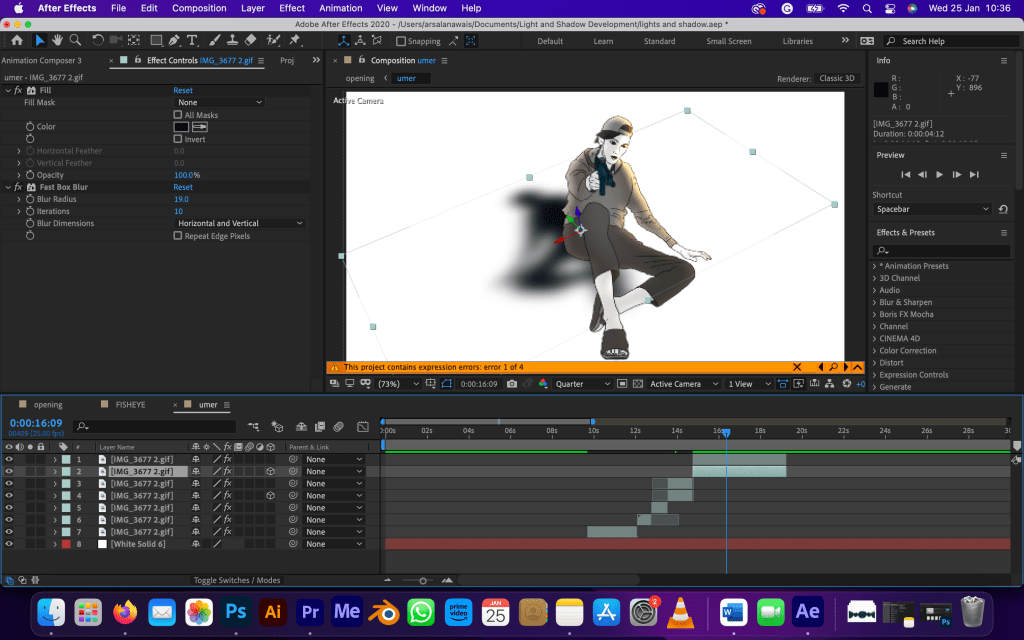
The camera rotation is most complicated shot of the entire film as I had to animate the each movement of the character from close up till forshortening and do frame-by-frame for the background as well. Miracously in yesterdays lecture we were taught perspective drawing (creating a fisheye lens to be exact) and how do to camera work in scenes that require perspective.
Another thing I found was that there is an effect called CC environnment in after effects that would help me in rotating the camera. I first had to create the fisheye lens version of the trench and then add a camera in after effects and use the orbit tool to create. it
I had to plan out the inside of the trench and the what the depth of each side would look like. When I applied the CC effect I realised that the ends (both right end and left end) join together a this creates a circle. Once I had this figured out, It was a matter of designing the field.

A bit of base colouring and the was ready to take this into after effects

References
http://www.youtube.com. (n.d.). CC Environment | Effects of After Effects. [online] Available at: https://www.youtube.com/watch?v=WFwbm0kOzRQ [Accessed 25 Jan. 2023].
http://www.youtube.com. (n.d.). Perspective Drawing in Photoshop! Grids and Tips. [online] Available at: https://www.youtube.com/watch?v=upxBGNcryRs.
Character Development | Update #4
I decided on creating the most complicated sequence first as the camera movement in this scene required frame-by-frame aniamtion. I recorded some reference footage for it and then did a bit of rotoscopy to get the movemnt right.
Initially I experimented with camera movement myself as how to camera would rotate around the character. Create a 3D feel in a 2D environment.
This is the only scene I drawed in 24fps and still looks a bit jerky/glitchy but I think I have gotten the effect. Every other frame-by-frame was animated at 12fps.

Below is a coloured version
For the monster, I had made its concept art during the practice 1 sessions and just improved upon it. Added textures and lighting and was satisfied with the result.

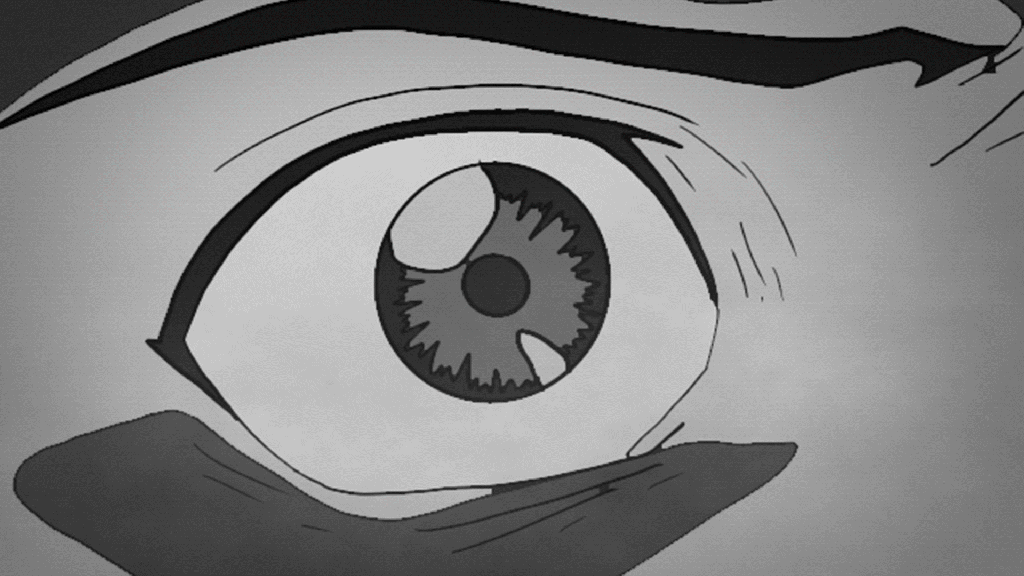
The second scene where frame by frame animation was required was the getting shocked expression. Instead of making the whole face, I animated just a close up of the eye to set a more horrific tone. I animted this sequence in 2s.
The last frame-by-frame one was the character falling down. It might not be how people usually fall but the impact of falling and effects sprinkled on top would sell it.
Decision Making | Update #3
As mentioned before, I felt that just using still images and little movement might not be considered as animation but rather as just motion design. So I came up with camera movements that would require frame-by-frame animation. At first I was considering keeping the environment in 3D but as I have little time to learn blender, I am going to a safer route and hand draw everything. The storyboarding phase took a while because at first I was thinking of movements as if we were shooting in live action but had to put a stop to it and rework on the frames as aniamtion has its limitations as well and did not want things to become complicated.

Creative Development | Update #2
Considering all the feedback, I have revised the story to fit within the given time frame while trying to keep the core essence/message of the concept intact. I do not why, but I always envisoned the story to be set in a No Man’s Land type setting. At first I thought of creating the story as a bottle episode ( where every situation is happening in one location) as recommended by my peers and teachers, but I felt that since it had no dialouges, I would be like motion design with still images having a bit of movement in them. So I went back and came up a clever way. Flashbacks are a writers easy escape device when he runs low on story and time. Just add a quick flashback scene and you’re good to go. The story during winter time.
The Story
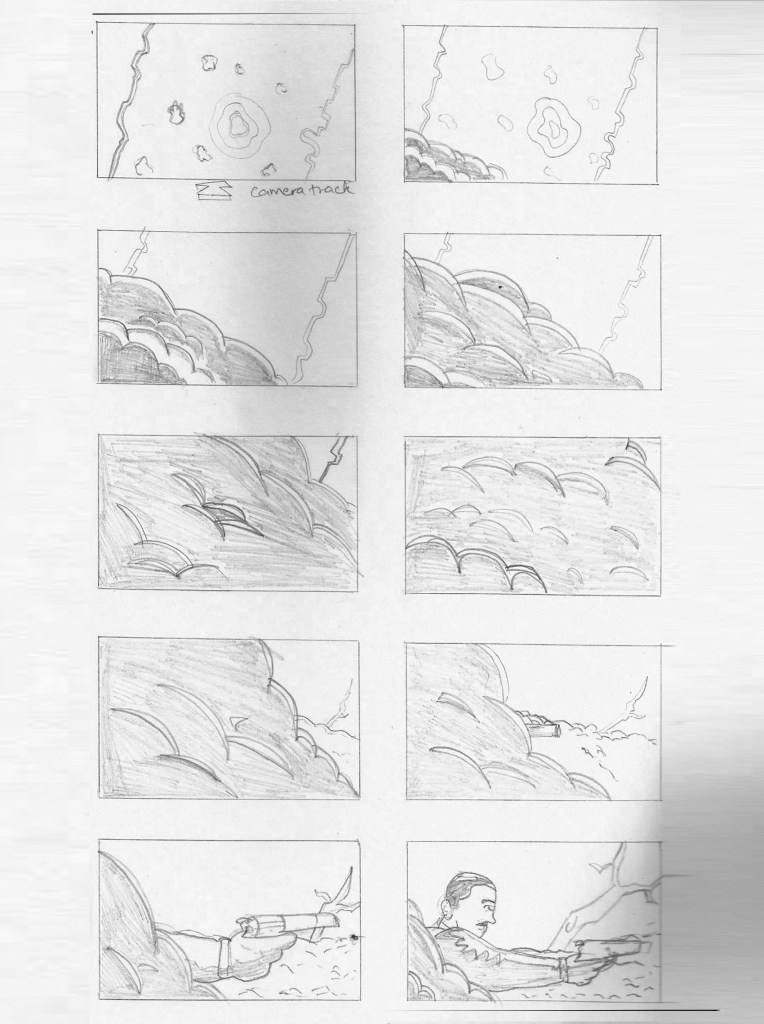
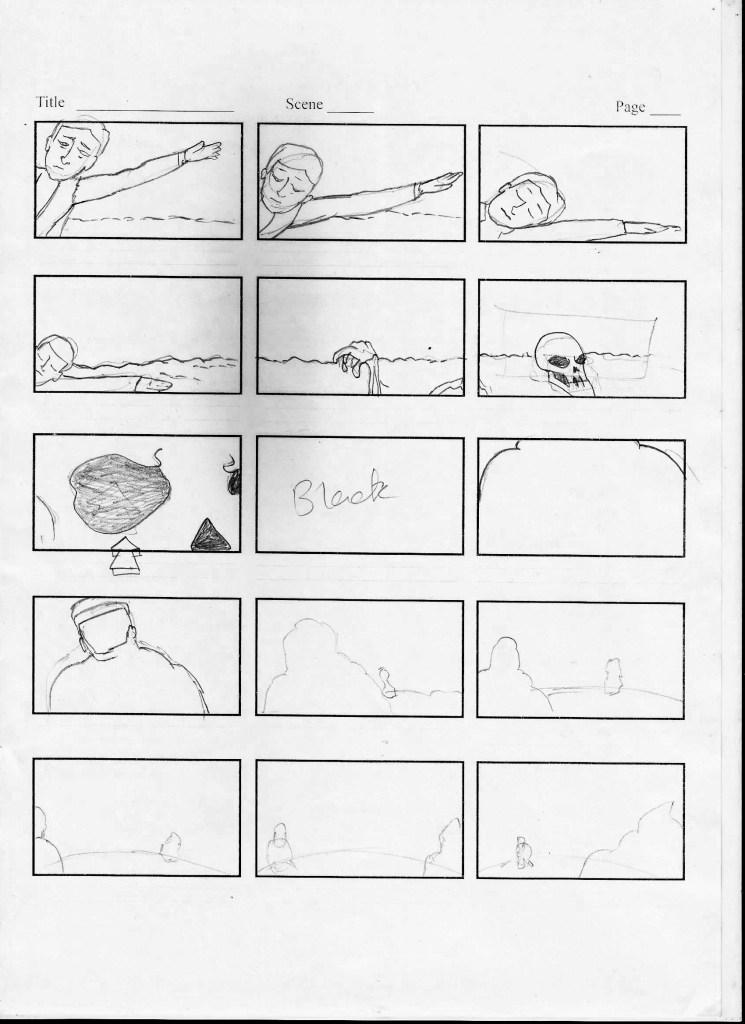
The film begins with a top shot of the battlefield and the camera is slowing tracking in.
Cut to: a track shot of the war field destruction.
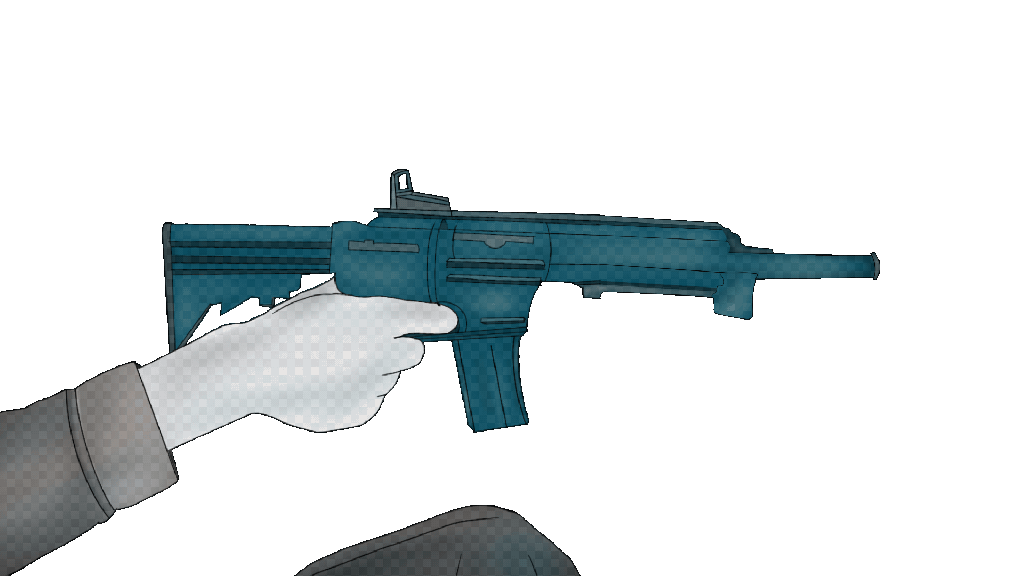
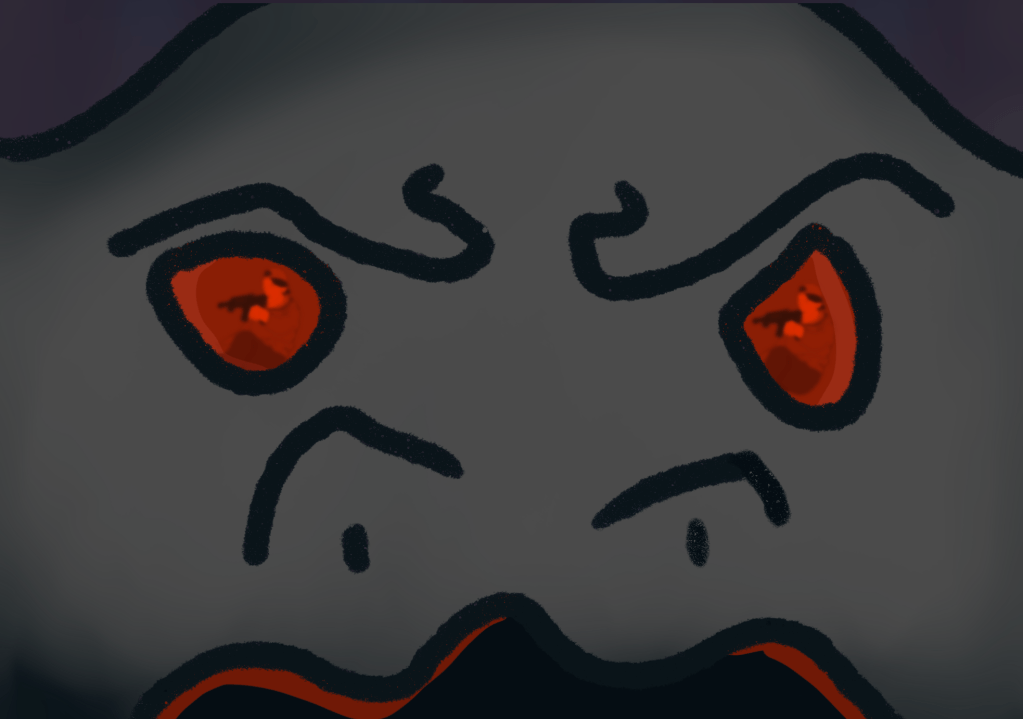
The screen fills with smoke. As the smoke clears we see a hand holding a gun. The camera rotates to reveal a young boy (in civillians clothes) holding a gun and pointing at someone/something. His hands are shaking as if he is scared. The camera then pans to reveal a dark monster on the other side. The monsters is similar to molten lava, with his blood shot eyes glowing but his hand also shaking. Camera tracks out to reveal that they are sitting in a trench. This is a very slow scene and is necessary to establish the ongoing conflict.
Cut to: a close up of the boy
cut to: a close up of the monsters with his eyes glowing. The glow over-takes the screen and a dip to white effect.
Cut to: a flashback scene (drawn in black and white similar to anime styles where the backgorund is white and the line art of the character, flat coloured and a weird glow in the scene). In the flashback scene we how fellow monsters being killed and vice versa Humans also dying on the battle field.
A soldier falls on the groud. We pan the camera along to show the horrific war. We come accross a skull and see an caterpillar crawling in to its eye. We zoom into the skulls eye, screen turns balck and when we zoom out (invisible cut) we are back in the trench.
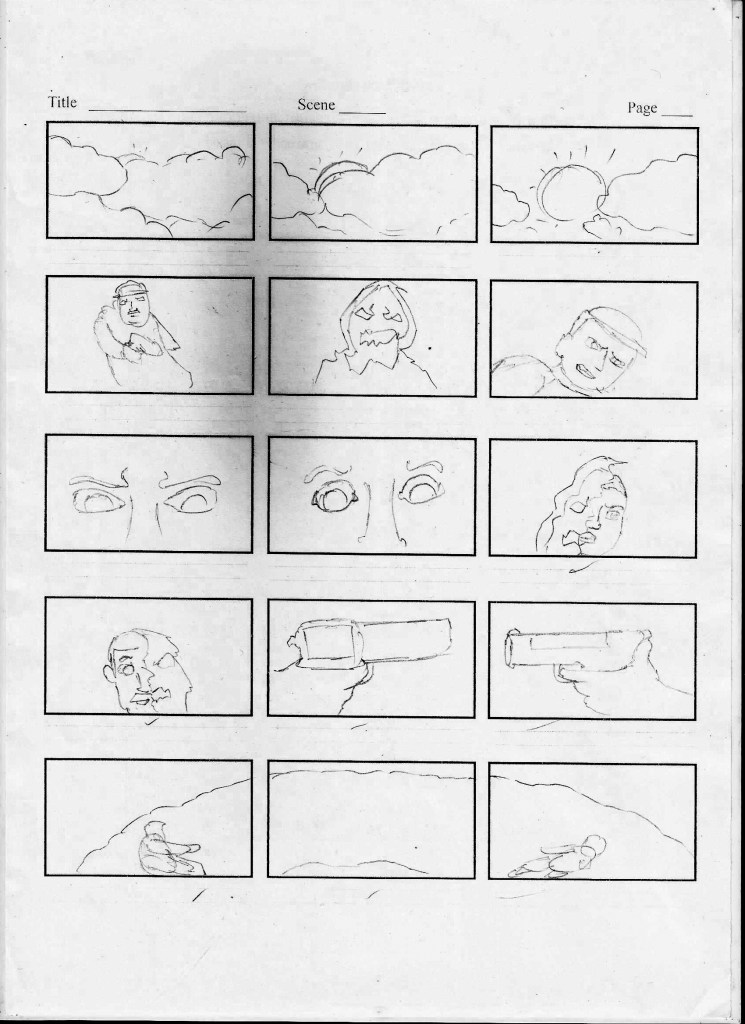
Cut to: the clouds clearing and sun shines. As the sun shines bright, all of the shadows start to dissappear.
the boy is shocked.
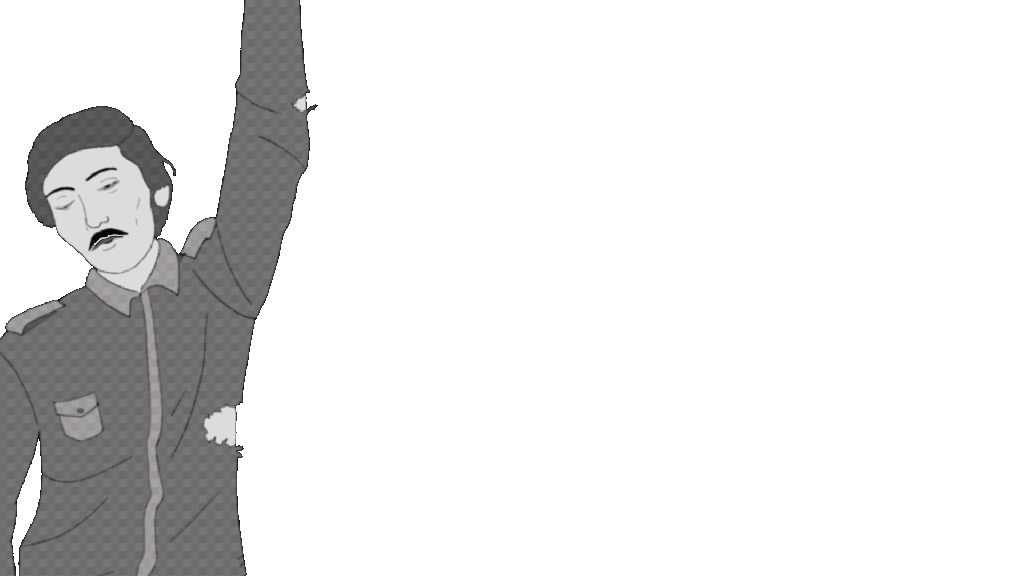
The monsters was actually a shadow figure and as the shadow dissappears a policeman is revealed. He realises that it is just his fellow kind and the monster was just his depiction of the other stature. The same realisation is for the policeman as he was experiencing the same thing. For him, the boy was the monster.
Both lower their guns.
Cut to: to shot of the trench.
fade to black.
Reflective Post | Update #1
Upon carefull considerations and after many discussionns, I opt to further develop Light and Shadow. I hold the project very close to my heart as I have seen this since my childhood. I wanted to shed light on the ongoing dispute over Kashmir and how both sides are similar and only seem different because of their outer shells which are their differences caused by world affairs. I have to consider the problems with this story and rework on some aspects to make it work. Keeping my discussions as well as my personal bias towards this story, I am considering this project for further development on the back burner for my thesis, so this 30s clip will be like a proposal to show my teachers that I am capable to tackle a story of this scale and ambition.
